本系列文章在 https://github.com/freestylefly/javaStudy 持(jing)续(chang)更(duan)新(geng)中,欢迎有兴趣的童鞋们关注。
一、 Struts2的Servlet的API的访问
1、完全解耦合的方式
所谓完全解耦合的方式就是不能获得作用域的对象,不能调用对象的方法,只能对对象中保存的数据进行操作,用到的是ActionContext对象进行操作
这种方式只能获得代表request、session、application的数据的Map*集合,不能操作这些对象的本身的方法。
1 | public class RequestDemo1 extends ActionSupport{ |
2、使用servlet的API的原生方式
就是先获得request等对象,然后可以对对象进行一系列的操作,使用的是ServletActionContext对象,可操作域对象的数据和方法
1 | public class RequestDemo2 extends ActionSupport { |
3、接口注入的方式
实现相关的接口,得到相应的对象
1 | public class RequestDemo3 extends ActionSupport implements ServletRequestAware,ServletContextAware{ |
二、单利问题
Servlet是单例的,多个程序访问同一个Servlet只会创建一个Servlet的实例。Action是多例的,一次请求,创建一个Action的实例(不会出现线程安全的问题)。
三、结果页面配置
1、全局结果页面
全局结果页面:全局结果页面指的是,在包中配置一次,其他的在这个包中的所有的action只要返回了这个值,都可以跳转到这个页面。
针对这个包下的所有的action的配置都有效。
1 | <!-- 全局的页面配置 --> |
2、局部结果页面
l局部结果页面:局部结果页面指的是,只能在当前的action中的配置有效。 针对当前的action有效。
1 | <action name="requestDemo1" class="com.canghe.struts2.demo1.RequestDemo1"> |
四、result标签的配置

五、Struts2的数据封装
1、属性驱动:提供属性set方法的方式(不常用)
编写页面
1 | <h1>1、属性驱动之提供属性set方法的方式</h1> |
编写Action
1 | package com.canghe.struts2.demo2; |
2、属性驱动:页面中提供表达式方式
页面
1 | <h1>2、页面提供表达式的方式</h1> |
Action
1 | package com.canghe.struts2.demo2; |
3、 模型驱动:采用模型驱动方式(最常用)
页面:
1 | <h1>1、模型驱动——采用模型驱动的方式</h1> |
Action
1 | package com.canghe.struts2.demo2; |
l模型驱动方式最常用的方式,缺点:只能同时向一个对象中封装数据,使用第二种可以向多个对象中同时封装数据
4、关于INPUT逻辑视图
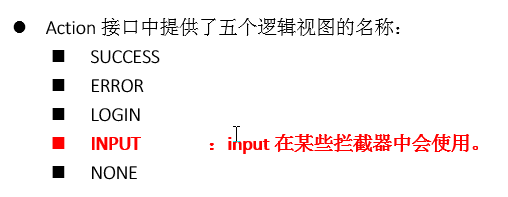
1 | <!--INPUT错误调准 --> |
当拦截器按照顺序执行,有一个出错,那么就会跳转到INPUT逻辑视图中,所以需配置全局的INPUT跳转
六、Struts2复杂类型数据的封装
比如当我们批量添加商品信息的时候,需要将数据进行封装
1、封装数据到List集合中
1 | package com.canghe.struts2.demo3; |
JSP页面:
1 | <h1>list集合的方式封装复杂类型的数据</h1> |
2、封装数据到Map集合中
Action:
1 | package com.canghe.struts2.demo3; |
JSP页面:
1 | <h1>Map集合的方式封装复杂类型的数据</h1> |
九、AOP核心思想
鞥切面扩展程序,想要增强某一个方法,来一个切面然后配置一下就好了,不需要修改源代码
本文章已同步至我的GitHub仓库:Javastudy,期待您的加入:blush:

本文章已同步至苍何的个人博客,可以直接在博客上留言哦:blush:

来我的微信公众号玩耍呗:blush:

扫码无套路关注我的CSDN博客:blush: